If you’ve ever stared at a flatpack cabinet box, felt the frustration of misaligned holes, or wondered if you’re overthinking the whole process, you’re not alone. As someone who’s been supplying material cabinets to contractors, small business owners, and residential renovators for over a decade, I’ve seen it all—from DIYers who finish a build in three hours to tradespeople who take twice that time because they skipped a critical step. Installing a material cabinet doesn’t have to be a guesswork game, though. It’s a mix of careful prep, attention to small details, and using the right tools for the job. Whether you’re fitting this into a workshop, a break room, or a storage space, this step-by-step guide will walk you through every part, so you can get it right on the first try. Material Cabinet
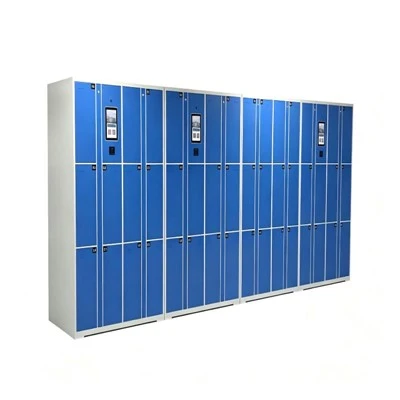
First, let’s talk about why material cabinet installation matters, even if it feels like just putting pieces together. These cabinets hold heavy tools, raw materials, and supplies—so if they’re not secured level and plumb, they’ll lean over time, doors won’t close properly, and you might even risk them tipping. I’ve had so many customers come back to me saying their first cabinet was wobbly because they rushed the installation, only to have to rework it later. That’s why I always emphasize taking the prep work seriously. Before you even open the cabinet box, there are three non-negotiable steps you need to do.
Start with measuring the space. This isn’t just grabbing a tape measure and writing down the height, width, and depth of your wall or nook. You need to account for obstacles too: electrical outlets, plumbing pipes, windowsills, and even baseboard heaters that might stick out. I recommend using a stud finder first, because most material cabinets need to be anchored to wall studs, not just drywall. Drywall alone won’t hold the weight of a full cabinet—you’ll end up with a hole if you only use wall anchors. Mark the studs with a pencil, then measure the distance between them. If your cabinet is made to fit that exact stud spacing, you’re ahead of the game; if not, you’ll need heavy-duty toggle bolts that can hold up to 100 pounds each. Also, double-check the height: if the space is under a window, leave at least six inches of clearance so you can open the window fully without knocking into the cabinet. Most of my customers forget that, and end up having to adjust cabinet doors later.
Next, clear the area. If you’re installing a cabinet in a workshop, move any tools or materials that are in the way. If it’s in a break room, remove furniture that’s too close. You’ll also want to lay down a tarp or old blanket to protect the floor—material cabinets, even unassembled, are heavy, and a dropped panel can scratch tile or wood floors. I once watched a customer drop a 40-pound side panel on a concrete floor and crack a tile, so that’s a simple step that saves a lot of hassle. Also, gather your tools before you start. No one wants to run to the hardware store mid-install because they forgot a drill bit or a level. Here’s what you’ll need: a tape measure, a spirit level (a 4-foot one works best for cabinets), a drill with Phillips and flathead bits, a stud finder, a pencil, a rubber mallet, a screwdriver, and a wrench. If you don’t have a level, you can use a phone level app, but I always recommend a physical one—they’re more accurate for long pieces.
Now, let’s move to unboxing and prepping the cabinet. When you get a cabinet from my team, it comes with all the pre-cut panels, screws, hardware, and a printed instruction sheet (pro tip: don’t lose that sheet—even if you think you remember how it goes, the screw sizes and placement can vary by cabinet model). First, lay all the pieces out on your tarp. Sort the hardware: small screws, hinges, drawer slides, and shelf pins. I like to group them in small bowls so I don’t mix them up. A common mistake here is dumping all the hardware in one pile and hunting for a specific screw later—this adds 20 minutes to your install, minimum. Also, inspect the panels before you start. Look for any scratches or dents that might have happened during shipping. If you find a defect, reach out right away—we offer free replacements for manufacturing or shipping damage, no questions asked. I’ve had customers try to work around a scratched panel, only to regret it when the cabinet looks uneven.
Assembling the cabinet is the next step, and this is where people often overcomplicate things. Most material cabinets use interlocking panels, so you don’t need a lot of glue—just the provided screws. Start with the base: lay the bottom panel flat, then attach the side panels. Use a square (or the back of a piece of plywood) to make sure the corners are perfectly 90 degrees. If the corners aren’t square, your cabinet will twist when you attach the top, which will make doors misalign. I always use a rubber mallet to tap panels into place gently before screwing—this ensures they’re tight without splitting the wood. When you’re screwing, don’t over-tighten the screws. Over-tightening can strip the holes or warp the panel, especially if the cabinet is made of solid wood. A good rule of thumb is to stop when the screw head is flush with the panel, not digging into it.
Once the main cabinet is assembled, add any drawers or shelves. Drawer slides are usually pre-drilled into the side panels, so just align the drawer front, attach the sides, and test to make sure the drawer slides in and out smoothly. If it sticks, adjust the slides with a screwdriver—most have small screws that let you move the slide left or right. For shelves, use the adjustable shelf pins that come with the cabinet. Don’t overload shelves, though—material cabinets are built for heavy items, but overstuffing will make the whole unit lean. Our product specs say each shelf can hold up to 75 pounds, so stick to that for safety.
Now, the installation part—this is the make-or-break step for a secure cabinet. First, lift the cabinet into place. This is much easier with two people. If you’re working alone, you can use a cabinet jack, but I always recommend a helper to avoid back strain or dropping the cabinet. Once it’s roughly in position, use the spirit level to check it front to back and side to side. Adjust the cabinet by shimming it with small wood wedges if it’s not level. Shimming is important because even a half-inch difference will make doors hang unevenly. Once it’s level, mark the stud locations on the cabinet’s back panel. Pre-drill holes through the back panel into the studs—this prevents the wood from splitting when you drive the screws in. Then, drive 3-inch screws through the back panel into the studs. We recommend at least four screws per stud, one near the top, middle, and bottom, to keep it secure. If your cabinet is a corner unit, attach it to the adjacent wall too, using the same method.
Next, attach the toekick and any trim. The toekick is the bottom panel that covers the gap between the cabinet and the floor—this not only looks better but also protects the cabinet from dust and dirt. Most toekicks snap or screw into the base of the cabinet. For the top trim, if your cabinet has it, align it so it’s flush with the cabinet’s top edge, then screw it in place. This gives the cabinet a finished look, especially if it’s in a visible area.
Finally, install the doors. Hinges usually come with adjustable screws, so you can tweak the door alignment until it’s flush with the cabinet frame. Close the door—if it gaps at the top or bottom, turn the hinge screws slightly to adjust it. The door should close smoothly and latch evenly, no sticking. Test both doors (if it’s a double-door cabinet) to make sure they meet in the middle without overlapping. If they do, adjust the inner hinge screws.
Wait, a few common troubleshooting tips I’ve picked up over the years. If your cabinet leans even after shimming, you might not have enough screws in the studs—add two more screws to the top and bottom. If doors stick, it’s usually because the cabinet isn’t level, or the hinges are misaligned. For drawers that slide unevenly, check if the drawer sides are parallel—use a tape measure to check the distance between the two slides at the front and back, and adjust if needed. And if the cabinet has any handles, make sure to attach them last—this avoids scratching the finish while you’re working.
Now, let’s talk about when to ask for help. If you’re installing a large, heavy cabinet (over 60 inches wide, or 100 pounds), don’t try to do it alone. Also, if you’re working with uneven walls or old plaster, that can make leveling hard—hire a handyman who’s experienced with cabinet installation. I’ve had customers try to install a large cabinet in an old house with plaster walls, only to end up damaging the plaster because they didn’t know how to anchor it properly. That’s not a reflection on the cabinet—it’s a space issue, and a professional can handle it quickly.
At the end of the day, installing a material cabinet is about patience and attention to detail. It’s not a race—take your time with measuring, leveling, and aligning, and you’ll end up with a cabinet that lasts for years. We’ve designed our material cabinets to be easy to install, with pre-drilled holes and clear instructions, so even first-time DIYers can get it right.
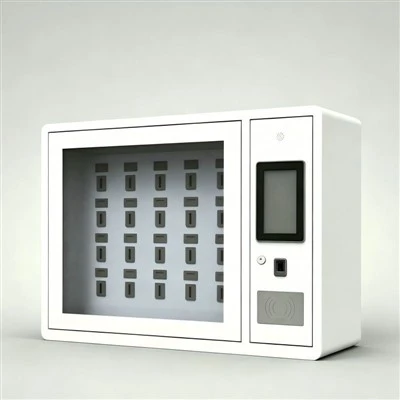
If you’re ready to purchase a material cabinet for your workshop, storage space, or break room, and you have questions about sizing, customization, or installation, feel free to reach out to our team to discuss your specific needs. We’re here to help you choose the right cabinet and make sure your installation goes smoothly.
Smart Locker References
- Woodworking Network. (2022). Best Practices for Cabinet Installation and Alignment. Retrieved from industry publications on commercial woodworking standards
- National Kitchen and Bath Association. (2021). Residential Cabinet Installation Guidelines. NBKA Technical Manual for Custom Cabinetry
- OSHA. (2020). Safety Guidelines for Heavy Material Handling in Construction and Renovation. OSHA Publication 3340-19
- Custom Wood Products Association. (2023). Installation Tips for Solid Wood and Composite Material Cabinets. CWPA Best Practices Handbook
Hangzhou Dongjie Intelligent Technology Co., Ltd.
Hangzhou Dongjie Intelligent Technology Co., Ltd. is one of the most experienced material cabinet manufacturers and suppliers in China, also supports customized service. Please feel free to wholesale durable material cabinet made in China here from our factory. For quotation, contact us now.
Address: 1st Floor, Building 2, No. 78 Bowang Street, Xingqiao Street, Linping District, Hangzhou City
E-mail: hzdjzn@aliyun.com
WebSite: https://www.cndongjiesmart.com/
